Label Printing for Inventory and Receiving
With Workday, you can create labels for printing with the use of integrations to pass the data to a third-party system. We’ve outlined the steps to take along with some considerations when setting up label printing with Workday Inventory.
Note that the steps outlined below have WDSetup assumed as your starting point. Most of the configuration can now be used from WDSetup with some simple changes to meet your needs. It’s recommended to use this as the starting point for any label integration setup.
Label Integration Systems and Business Processes in WDSetup
- CCSM Document Labels Goods Delivery Groups Outbound
- CCSM Document Labels Goods Delivery Tickets Outbound
- CCSM Document Labels Receipts Outbound
- CCSM Location Labels Inventory Locations Outbound
- CCSM Location Labels Locations Outbound
- CCSM Location Labels Par Locations Outbound
Label Integration Sequence Schema in WDSetup
- DELGRP_[seq]
- DELTIX_[seq]
- RCT_[seq]
- LOC_[seq]
- INVLOC_[seq]
- PARLOC_[seq]
All sequence generators have 10 digits in the [seq] and are padded with zeroes.
Label Integration Condition Rules in WDSetup
- Goods Delivery Group Labels
- Goods Delivery Ticket Labels
- Inventory Location Labels
- Location Labels
- Par Location Labels
- Receipt Labels
Initial Setup
- Maintain Inventory Printer Types
- Add a row to enter in the type of labels.
- Maintain Label Printers
- Add a row for each label printer and enter the required information.
- A location must be set up and used to complete the addition of the printer.
- This name is sent to third-party label printing software.
- Add a row for each label printer and enter the required information.
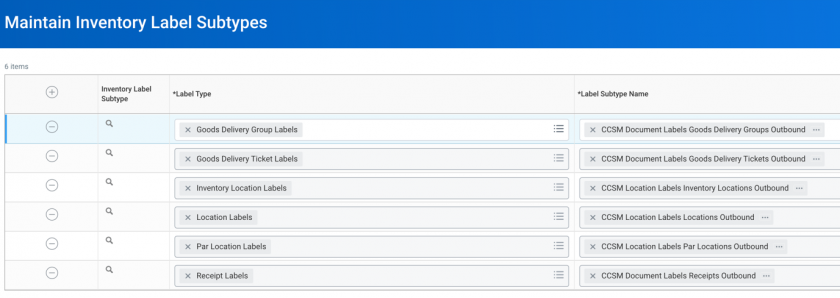
- Maintain Inventory Label Subtype
- Other subtypes can be added for any other integration systems created.
- The below picture illustrates the subtypes already included in WDSetup.
Document and Location Label Setup
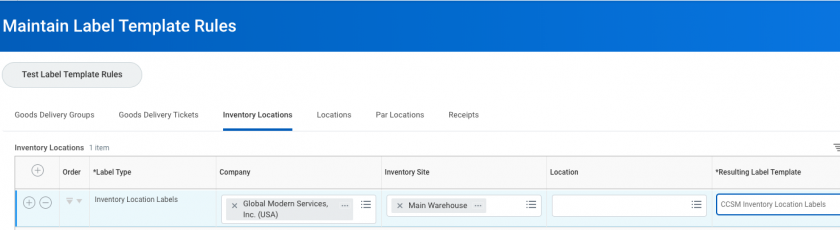
1. Maintain Label Template Rules
- Configure each type by adding a row for each template that you have using available variables.
- An example of the setup is below for Inventory Locations.
- Note: More information can be found below on Receipt Label setup
2. View (Create) Integration System
- WDSetup provides each label type as an integration system, which is noted in Design Notes, Label Integration Systems, and Business Processes in WDSetup.
- Search for and view each one to complete and review the setup steps below using the View Integration System task.
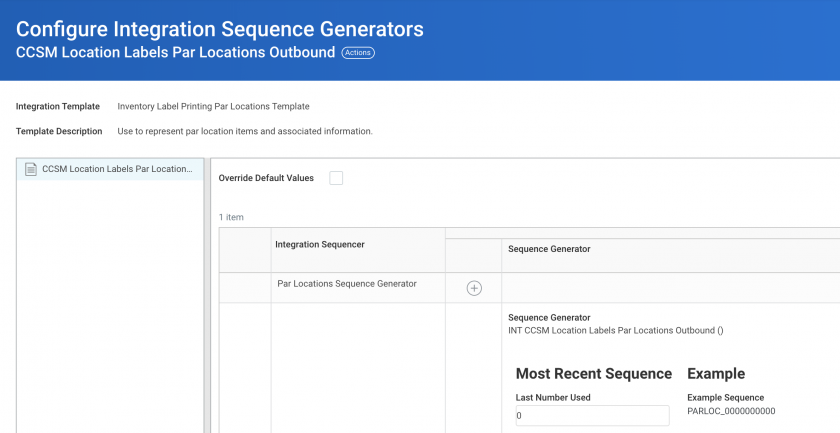
2.1 Related Action > Integration System > Configure Integration Sequence Generators
- WDSetup provides integration sequence generators for all Inventory Label events. The schema is listed in Design Notes, Label Integration Sequence Schema in WDSetup. You can choose to alter the sequence.
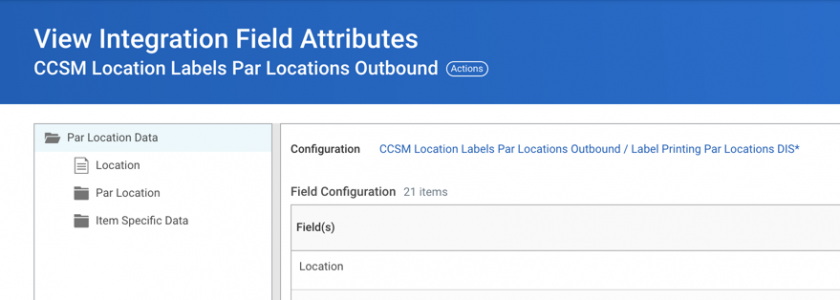
2.2 Related Action > Integration System > Configure Integration Field Attributes
- Check each field that is required to be sent and printed on the label type that you’re configuring.
- Complete this step for each label type/integration system being activated.
Some fields are selected by default. Review each label integration for proper field selection.
3. View (Create) Business Process
WDSetup delivers a business process tied to each of the previously mentioned label integration systems. The complete list is found in Design Notes, Label Integration Systems, and Business Processes in WDSetup. Search for and select each business process where you’ll create labels.
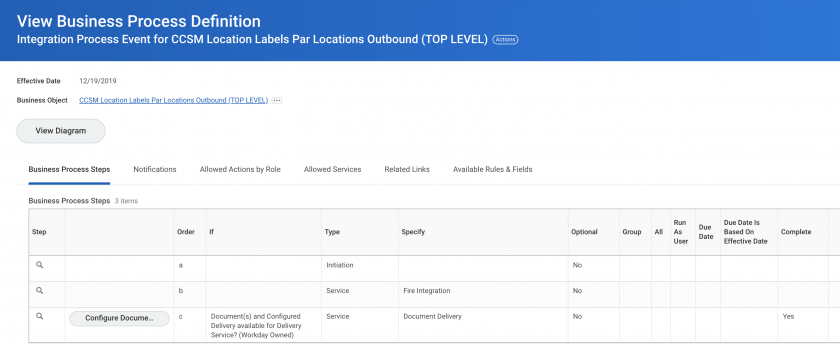
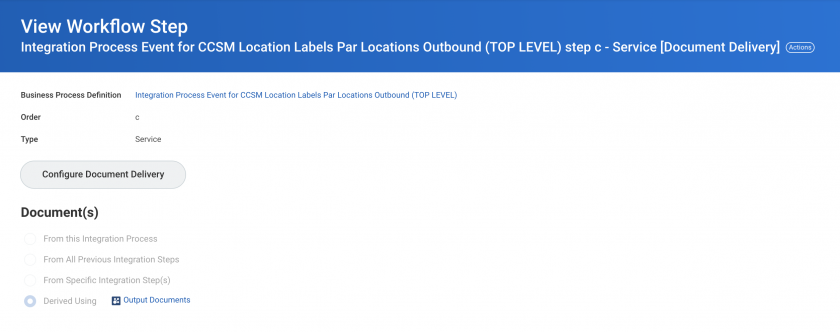
4. Business Process > Configure Document Delivery
- Click the final step in each business process to set up your connections to your SFTP server for passing the files.
- WDSetup has sample values to use as examples and to ensure if you forget to update, you receive a validation error. This step must be completed to your site specifications.
- Workday produces the Receipt label file and a Performance Log when the integration is executed. If you don’t want the Performance Log file sent to your server, check the Document Tags associated with a sample of a Receipt file and a Performance Log file. Select a tag that is only on the Receipt label output and include that tag on your Document Delivery step in the Document Filters section.
Note: The Performance Log file can’t be prevented from creation currently.
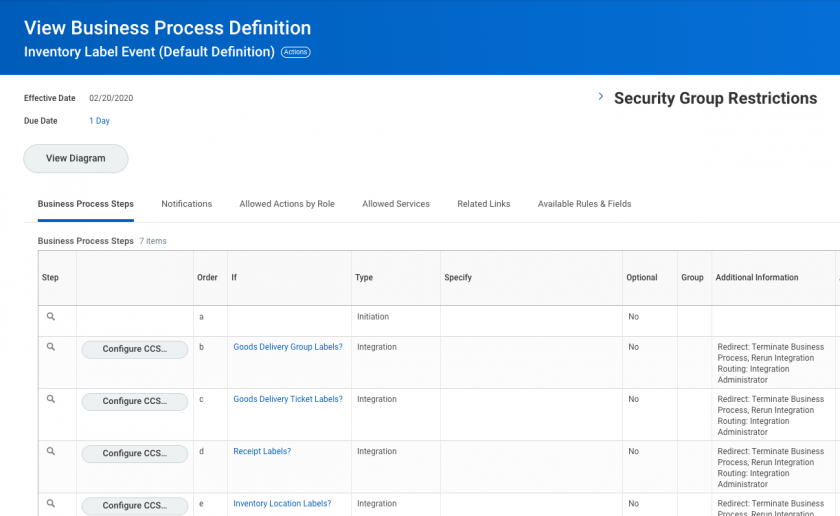
5. Configure Business Process: Inventory Label Event
- WDSetup delivers the Inventory Label Event business process with configuration noted above.
- All document and label type events are configured with runtime variable values that should be correct for most deployments.
You can validate and update the runtime values if required by clicking on the configure button for the respective row.
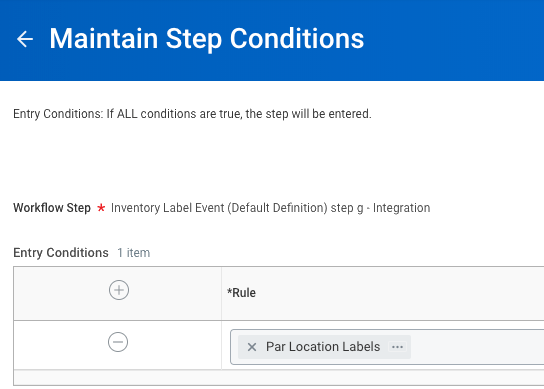
5.1 Step Related Action > Maintain Step Conditions
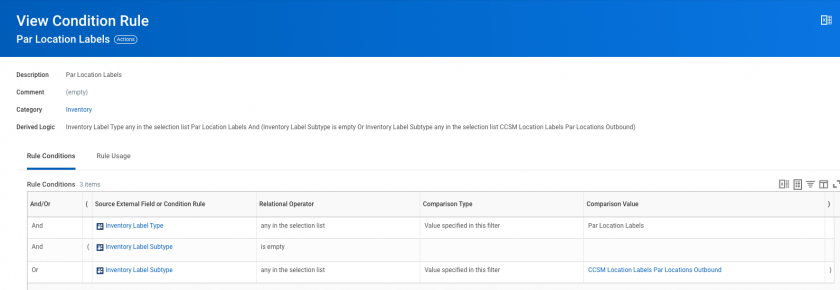
- In certain cases like with Ad Hoc Location label types, it's necessary to add condition rules on the business process steps that cause only that type of label event to fire.
- WDSetup has configured step condition rules for each process similar to the example below.
A list of condition rules can be found in Design Notes, Label Integration Condition Rules in WDSetup.
Receipt Labels
Receipt labels can be printed as needed using the Create Ad Hoc Document Labels task. Workday also provides a service step on the Receipt Event business process to create and send the entire receipt document for printing at the time of submission using a single file integration.
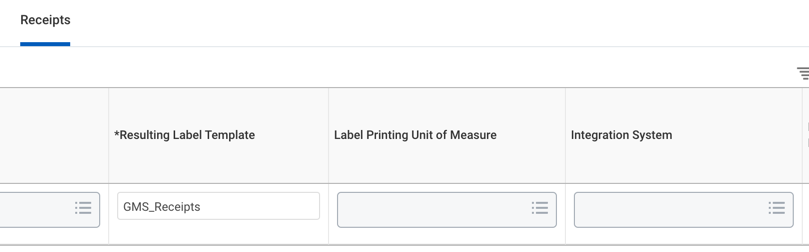
During the setup of the Receipt label template rules (Maintain Label Template Rules task), you’ll use/update CCSM Document Labels Receipts Outbound (or by creating a new one) to pass the data to your third-party system for printing. If you input your Integration System below (see screenshot), and not on the Business Process for Receipts, you have a unique file for each receipt line being sent to your third-party label system. These files will generate after you move to the next receipt line after entering a quantity to receive in the prior line. This gives you a more real-time experience.
If you enter that integration on this task and have it on your Receipts Business Process, you receive duplicate labels.
We recommend that the setup looks similar to below on this task (leaving the Integration System blank) and then incorporating the label generation during the Receipt business process.
Business Process Event
Setting up labels on the business process triggers 1 file to be sent for the entire receipt. The steps below highlight the required setup from a Receipts label perspective.
- Locate the Receipt event business process that you’re updating and proceed to Edit mode.
- Add 2 new rows.
- The 1st should be the Workday delivered Service of Label Printing with Receipt BP. This incorporates xml tags for printer, number of copies, and so on.
- For the 2nd new row, set the type to Integration, click OK. You should have a button now on the new row to configure your integration step similar to below.
- The Integration step must come directly after the service step added.
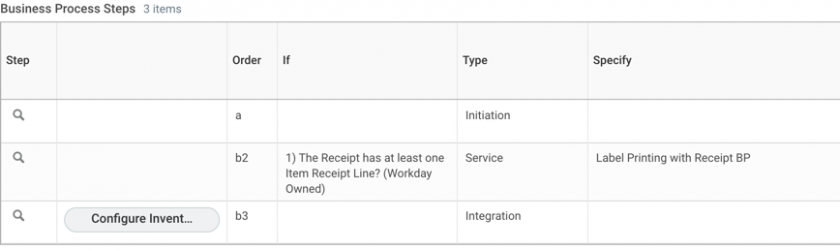
- Click the button on the 1st page, enter the name of the integration you created for Receipts or from WDSetup (CCSM Document Labels Receipts Outbound).
- The next page is where you’ll finish the setup.
- If you’re using the CCSM Document Labels Receipts Outbound integration, no further action is required.
- If you aren’t, you need to Choose Determine Value at Runtime for the Value Type field and then Receipt Line for the Value. Click OK to save your changes and exit out of the business process.
- Note that when using this setup, the number of labels generated per receipt line is equal to the quantity received for the UOM unless the UOM is specified on the Maintain Label Template Rules task. In the Label Printing Unit of Measure field, valid conversion values are:
- Base Unit of Measure
- Put Away Unit of Measure
Example: You’ve selected the Base Unit of Measure for the Label Printing Unit of Measure setup. If you have an item setup as 4 each / case and receive 1 case, the quantity of labels would be 4.
Location Labels
When setting up label printing for the Inventory Location and Location labels, you need to select the appropriate template dependent on what method is being used.
- Original Method: Location business object
- Inventory Locations: Inventory Label Printing Inventory Locations Template
- Locations: Inventory Label Printing Locations Template
- New Method (2021R1): Storage Location business object
- Inventory Locations: Inventory Label Printing Inventory Enabled Locations Template
- Locations: Inventory Label Printing Enabled Locations Template
Goods Delivery Ticket Labels
When setting up label printing for the Goods Delivery Tickets, you need to set up the Receipt business process in the correct sequence to populate the provided fields. To create the Goods Delivery Ticket Label when creating a receipt, you should configure the Initiate Goods Delivery Event service step to occur before any integration step, as shown below:
- Original Method: Location business object
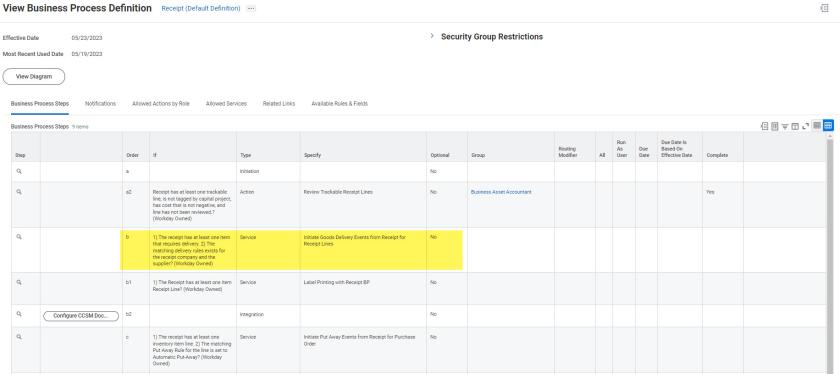
If the service step is ordered to occur after an integration step, the ISU on the integration will display as the initiator of the Goods Delivery Event and the Created By field on the delivery ticket won’t be populated.
Adding More Data to Outbound Labels
When setting up label printing, you might discover a requirement to add more data fields that aren’t included in the delivered label integrations. That is, Add a custom Alternate Item Identifier to the inventory location label or requisition internal memo to the Goods Delivery Ticket label.
You can satisfy the requirement for more data fields by using the Configure Integration Field Overrides option from the related actions menu on any of the label integration systems. By using the Extended Fields grid, you can add custom fields to the outbound XML generated by the integration system. You’ll need to add a row to the grid, name the data field (will become the XML Element), the Data Type, and select the Workday field to include.
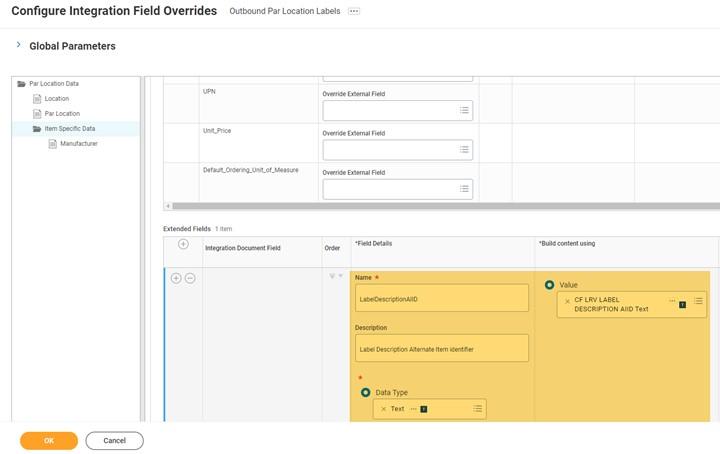
After adding Extended Fields to an integration system, test to make sure the data is correctly populating in the output file as expected. For detailed steps with an example use case of adding alternate item identifiers and Requisition Internal Memo to the outbound labels see the Contributed Solution: Add AIID to Par Location Label.